PowerPoint is used everywhere, but it can’t be viewed or edited on every device. That’s a problem in an increasingly BYOD world, where many audience members could be wielding Android tablets instead of PCs.
Take advantage of PowerPoint 2013’s versatile Export tool to create versions for posting and sharing that embrace all devices. Here’s how to save a presentation as a PDF, a Word document handout, and an RTF outline.
Your audience will thank you later.
First, make sure you save the presentation you’re working on in the default format. That way, if anything goes awry, you can always come back to your saved copy.
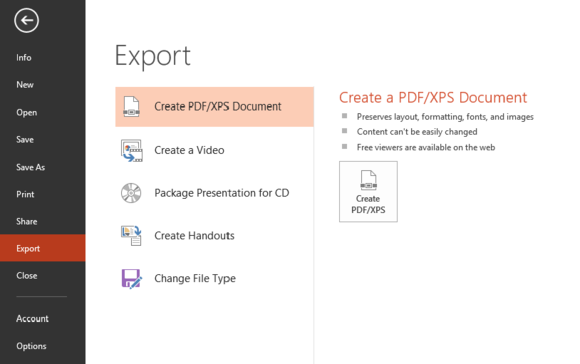
Next, open the Export options in PowerPoint by clicking File > Export.

From here, you will see options to ‘Create an PDF/XPS Document,’ ‘Create a Video,’ ‘Package Presentation for CD,’ ‘Create Handouts,’ and ‘Change File Type.’ We’re not going to worry about creating a video or packaging the presentation for CD for this tutorial.
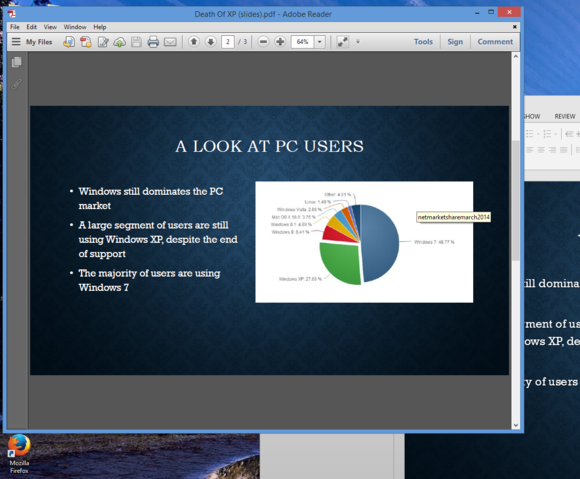
Adobe’s Portable Document Format is the gold standard of portable documents—meaning they can be opened anywhere, regardless of operating system or platform. PDFs are also printer-friendly, meaning those who prefer ink to electrons can print a hard copy.
In the Export screen, the ‘Create PDF/XPS Document’ tab should be selected by default. Click the Create PDF/XPS button. The familiar Save As dialog will appear, but with some options at the bottom.
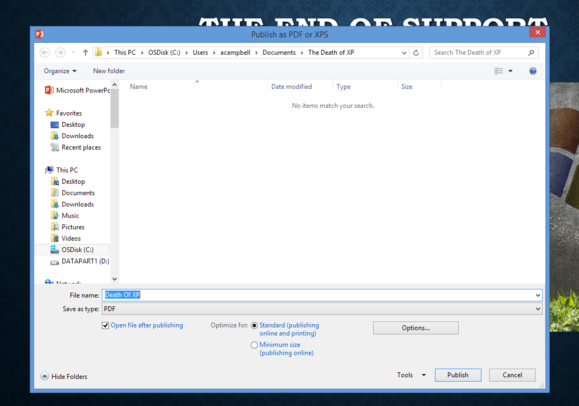
By default, if you export your presentation as a PDF, the PDF will simply be a collection of the slides, with one slide per page. But there’s more functionality in the PDF export than meets the eye.
If you click Options…, another dialog will pop up. From here, you can select which slides to export, and what to publish.
Look for the drop-down menu labeled ‘Publish what.’ You can select “Slides,” “Handouts,” “Notes pages” or “Outline view.” Slides is the default option.
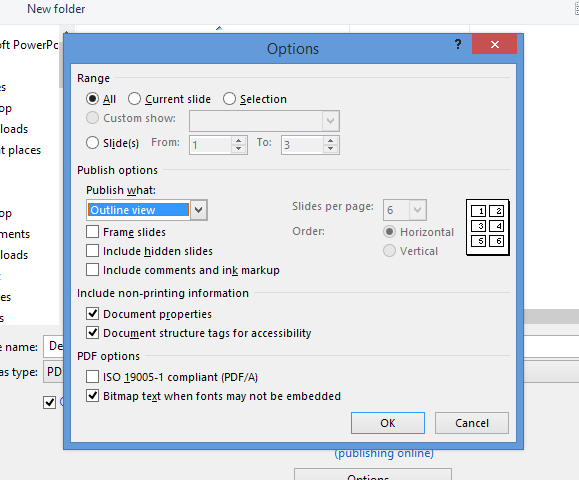
The Handouts option will display up to nine slides on a page, which is great if you want to print copies of the presentation without killing an entire forest in the process. If you select Handouts, the ‘Slides per page’ and Order options will be enabled to the right.
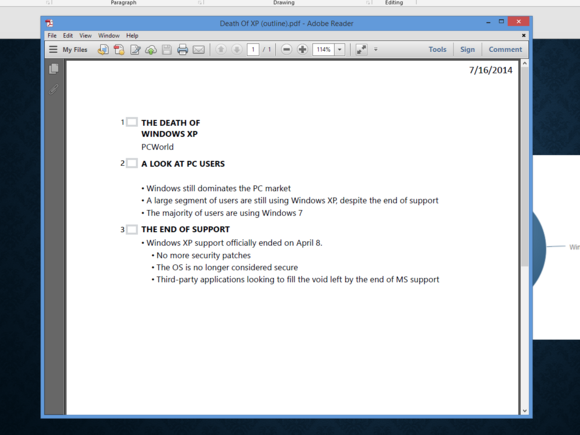
The ‘Outline view’ option will create just that: a PDF with an outline of the presentation. Each slide will be shown as a header, with bullet points shown as subheads.
In most situations, you can leave the other options alone.
Click OK when you’re done, and click Publish to create the PDF.
While the handouts created with the PDF exporter are well and good, the Word document handouts are a bit better. Exporting the handouts as Word documents gives you greater control over the end product.
From the Export screen click the Create Handouts tab and click the Create Handouts button. A small dialog box will pop up showing the different output formats for your handouts.
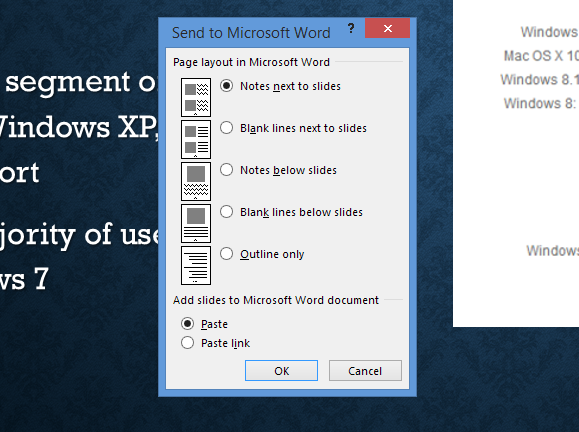
The section at the bottom of the dialog asks how you want slides attached to your Word document. Make sure Paste is selected so the slides themselves will be inserted into the document. If you select Paste link, you will need the original PowerPoint presentation to see the slides in the Word document, which defeats the whole purpose of exporting a file in a different format from the original.
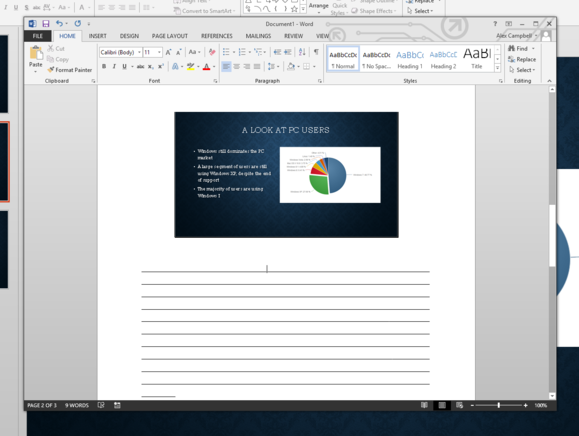
The options ‘Notes next to slides’ and ‘Notes below slides’ will output any presentation notes that you have entered for each slide. The other two options will insert blank lines underneath or next to the slides. While this is great for taking notes on paper, it’s not the best way to view your slides on a computer or mobile device.
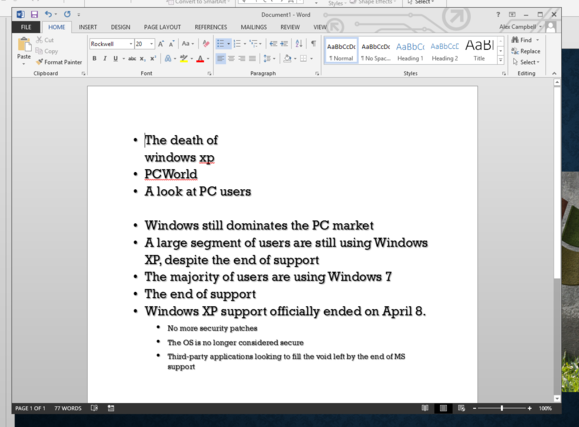
‘Outline only’ will produce an outline, but won’t show the hierarchy of the slide title and content. You’ll have to indent the subheads and details manually to organize the information. While this offers a lot more control, this method could be really tedious with a long presentation.
When you’re done, click OK. Word will launch and open an untitled document with the information from your presentation. You can edit the content and save the Word document for distribution, or print the handouts. Of course, you can also export the Word document as a PDF using a PDF Printer (File > Print) or export it as a PDF (File > Export > Export as PDF/XPS Document > Create PDF/XPS Document).
A PowerPoint presentation can be exported in a surprising number of formats. To see your choices, click on the Change File Type tab in the Export screen.
Under ‘Presentation File Types,’ there are six formats to choose from. We’re really only concerned about two of them in this case.
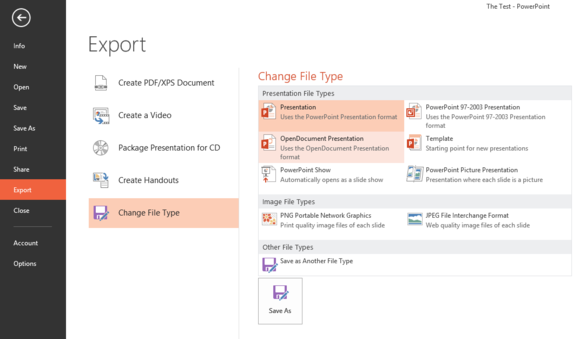
The ‘PowerPoint 97-2003 Presentation’ file type saves the presentation as a PPT file (as opposed to the newer PPTX). The PPT file type is readable by older versions of PowerPoint, dating back to 1997. If you’re sure sure your recipient is running some version of Office but you don’t know which one, a PPT file is usually a safe bet.
Another option is the ‘Open Document Presentation,’ which saves the presentation as an ODP file. While modern versions of open-source suites like LibreOffice can read PowerPoint files, ODP is the preferred format. Modern versions of Microsoft’s Office and Google Apps can read ODP files as well.
After clicking Save, a dialog may pop up and ask you if you want to proceed. The dialog is basically informing you that some effects and transitions are only available to your version of PowerPoint, and your presentation will lose those effects if you change the format. Click Yes to save the file.
There are even more ways to save the presentation for posting the content online. From the Export screen, click the Change File Type tab. Click Save as Another File Type and you’ll presented with a Save As dialog.
The ‘Save file as’ drop-down will have a list of formats that PowerPoint can convert the presentation into, including the two listed above.
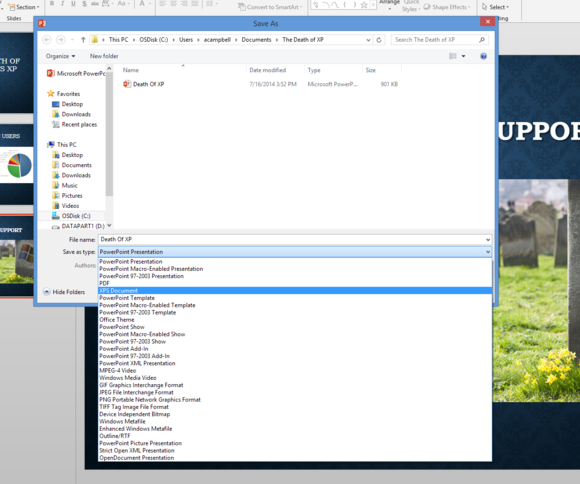
I got good results using the Outline/RTF option, which creates an outline in rich-text format (RTF). The outline preserved hierarchy by making each slide a different header. RTF is pretty much universally recognized, but it won’t have as many formatting options as a Word document will.
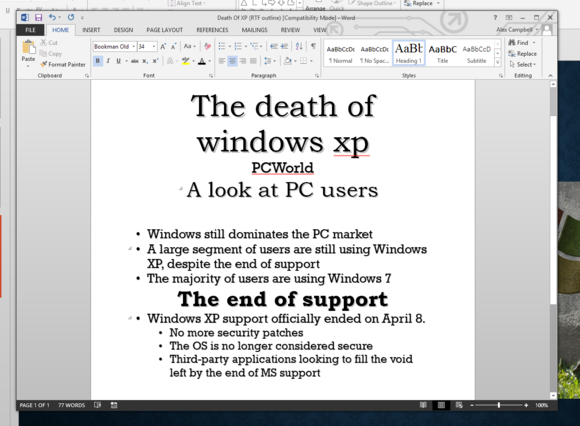
If you use one of these methods to export the information shown in your presentation, your audience will have an easier time if they need to look up information from the slides later.